|
|
|
|
|
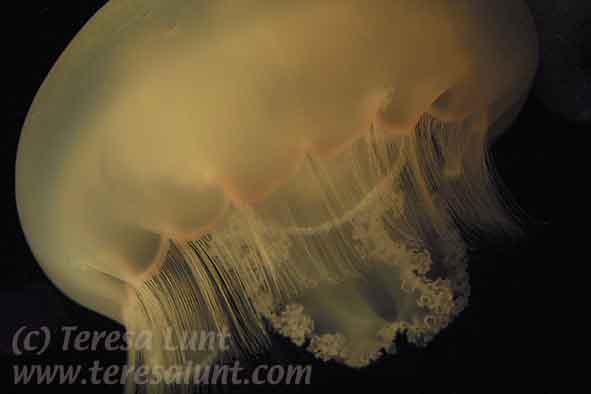
Tutorial 11: Jelly This time we will work with a photograph taken in the Monterey Bay Aquarium in Monterey, California. It was taken with my Canon D30 digital SLR camera. The original photo can be seen in Figure 1. It is a picture of a moon jellyfish. It is called a moon jelly because its large, dome-like surface somewhat resembles the surface of the moon. Like all aquariums, this one presented extremely difficult shooting conditions. The light is kept very dim, and the jellies are moving in their tanks. To shoot in these conditions you have to increase the ISO (film speed analog) to a very high number, such as 1600. This allows you to get a faster shutter speed, thereby getting less motion blur and being better able to deal with the dim lighting. But shooting at a very fast ISO in a digital camera can add a lot of noise to the picture. To reduce the amount of noise, I tried to get closeups of some of the larger jellies. This allowed me to almost fill the frame with a light color, which means more light is entering the camera, which means less noise. To get so close, with my camera almost touching the glass of the aquarium tanks, I used a macro lens. A macro lens lets you focus the lens very close to the subject. Also, in a museum such as this, it is not really nice to bring in a tripod, because these places are very crowded with people trying to get up close for a good look at the displays. So I worked with a hand-held camera, often bracing myself and the camera by leaning myself or the camera against the glass of the tank. I like the dreamy feeling of this photograph, especially the feeling that the jelly could be a planet or some other object floating through outer space. The actual aquarium display gave this feeling, as the moon jellies drifted lazily through the water in their tanks, occasionally contracting themselves to propel themselves along. |
|
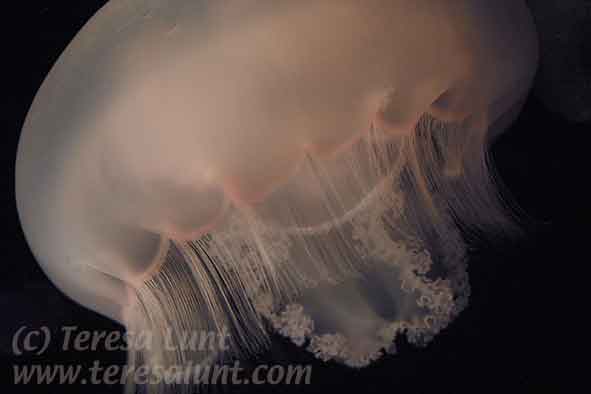
Fibure 2 shows the image after I corrected the color. I first examined the three channels (R, G, and B) using the Channels palette. The green channel was bright and the most noise-free. So I decided to experiment by adding some of the green channel to the red or blue channels. Adding some of the green channel to the blue channel gave the best effect. This is because the original image was too yellow, and a way to get rid of too much yellow is to add its opposite, blue. Using Image>Adjust>Channel Mixer, I added 30% of the green channel to the blue channel. This has the effect of somewhat lightening the image, but most importantly of better balancing the colors, so that the moon jelly looks the milky white that it actually is. |
|
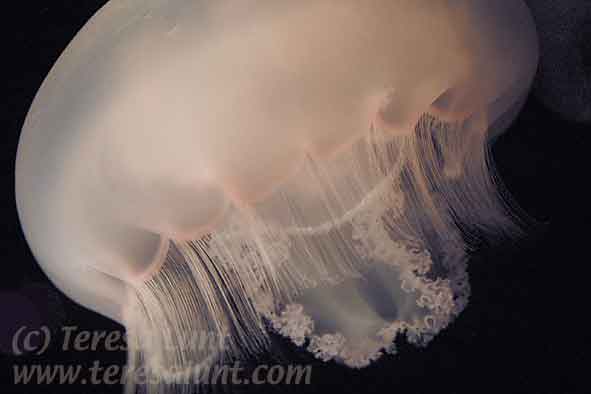
Next I made a duplicate layer in Photoshop (Layer>Duplicate Layer). Turning off the visibility of the upper layer (by clicking on the "eye" next to the layer in the Layers palette), I used Image>Adjust>Curves to increase the brightness of the lower layer, as seen in Figure 3. Then I turned the visibility of the upper layer back on and created a layer mask for the upper layer, using "Reveal All." With this option, the layer mask is all white. We will use the Paintbrush tool to paint black paint onto the layer mask. Where we paint on the layer mask, the lower layer will show through. First we select black as the foreground color, in the Color Picker (indicated by the two big boxes in the main toolbar: the upper left box is the foreground color, the lower right box is the background color. To choose a foreground color, click on the upper left box and the Color Picker will come up. Click on black to select that as the foreground color. The Paintbrush tool automatically uses the foreground color to paint with.) Now, select the Paintbrush from the Tools palette. In the Layers palette, click on the all-white layer mask for the upper layer and start painting on it. For this type of work, I find it most natural to use a pen input device, such as the Wacom tablet. With a pen input device, painting feels just like drawing with a brush or crayon in your hand. There are some very inexpensive low-end tablets, and I recommend buying the smallest one. Not only is the smallest one the most inexpensive, but it is the easiest to use, since you don't have to move your drawing hand over large distances. |
|
When painting on the layer mask, choose a very large brush size to start with. This helps to quickly and uniformly cover large areas. Then, when you need to paint on smaller details, you can pick a smaller brush size. You can also pick a low to medium opacity for your brush, so that each stroke makes only a small difference in shade. This lets you paint many strokes over each other until you get just the right amount of see-through to the layer below. In this case, since the layer below is lighter than the top layer, as you paint on the top layer's layer mask you will see the part of the image you are painting over get lighter and lighter. Continue painting on the layer mask until you have achieved the effect you want. If you overdo it, you can always undo some of your stokes by using the History palette; just click on an earlier history state and then continue painting from there. Other ways to fine-tune the amount of transparency you get from the layer mask is to change the opacity of the upper layer, or to change (in Image>Adjust>Curves) the darkness of the layer mask. Another way to do this is to change the brightness of the lower layer by using Image>Adjust>Curves, followed by Filter>Fade; try different adjustments until you get the effect you want. You can also undo some of your work on the layer mask by selecting white as the foreground color and painting white onto the layer mask. Alternate between painting white and black on the layer mask to get exactly the effect you want. You can compare the effect before and after the layer mask by disabling and then enabling the layer mask (Layer>Disable Layer Mask and Layer>Enable Layer Mask). When I am through, I flatten the image to combine all the layers using Layer>Flatten Image. The results so far can be seen in Figure 4. |
|
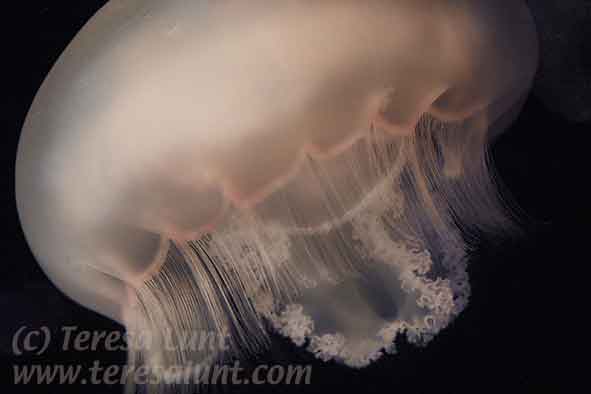
Now what I want to do is to emphasize the color in the pink edging just above the jelly's fringe. To do this I will use Image>Adjust>Hue/Saturation. But I want to control just where the red color is enhanced. So I start by creating a duplicate layer, just as before, by using Layer>Duplicate Layer. Then on the top layer I use Image>Adjust>Hue/Saturation, select Red, and increase its saturation by 15 to 20 percent. This increases the saturation of the pink edging, but also adds a reddish tone to some of the other parts of the image. To keep the color emphasis of the pink edging while removing the reddish tone from the rest of the image, I create a layer mask, just as we did above, by using Layer>Add Layer Mask, with the Reveal All option. (Make sure you have the top layer selected in the Layers palette when you do this.) Again, we use the Paintbrush to paint black paint onto the layer mask wherever we want to get rid of the reddish tone. When we are done, we again flatten the image using Layer>Flatten Image. |

|
The final result is an image of a milky white jelly with the feeling of a glowing life force in its globe, that seems almost lit from within. The jelly retains the delicate feel of the lacy fringe, whose delicacy is further emphasized by the highlights we added. Just the right amount of pink edging adds some color interest to the image, while the blue shadows lend it mystery. While the image still has a photographic feel, the viewer also senses the slow, lazy drifting through a dense black outer space. |
![]()