|
|
|
|
|
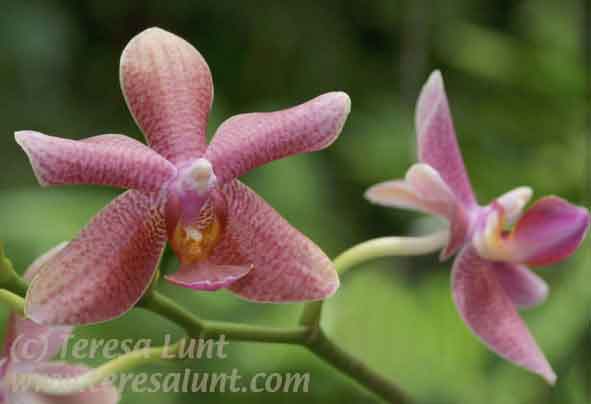
Tutorial 12: Hawaiian Orchids This time we will start with a quite nice looking photograph and turn it into an unusual image. Again, we will start with a photograph of orchids, only this time these orchids were taken on a recent trip to the Big Island of Hawaii, in one of their many beautiful botanical gardens. Figure 1 is the original photograph, taken with my Canon D30 digital camera. |

|
An obvious problem with this photo is the large petal sticking straight up in the lower foreground. Another is that that there is a lot of distracting detail in the lower left-hand corner of the picture. Another thing that bothers me a little in this picture is that the lush green background feels brighter and more saturated than the orchids which are the subject of the picture. The picture also feels too dark overall. As we manipulate this image, we will want to correct these problems. We will remove the offending petal, stretch the picture a little to reduce the amount of distracting detail in the lower left, and will alter the colors and brightness of the picture so that your full attention is on the flowers, which will be much brighter than the background, which we want to be somewhat muted. The first problem we will tackle is the protruding petal in the lower foreground. We use the rubber stamp tool (also called the clone tool) to get rid of this petal. To do so, select the rubber stamp tool from the toolbar. The rubber stamp tool options palette lets you choose several options for this tool. In this case I selected "normal" as the blending mode. Using this mode, Photoshop will copy pixels from where I pick them up to where I put them down. You pick up pixels by holding down the alt key and clicking on a portion of the image. To put them down, you move the brush to the spot you are working on, and click. There are times when you might want to select a different blending mode, such as "darken" if you are trying to get rid of white specs, for example. The darken mode puts down only pixels that are darker than the ones that were already there. Conversely, the "lighten" mode is good to cover up dark specs in a light background. Choose a soft-edged brush to work with from the brushes palette; this lets the new pixels blend in with the old ones for a more natural look. Choose a brush size that big enough that the job won't take forever, but small enough that you can make the cloning look seamless and natural. It takes some patience, but you can see in Figure 2 that I have successfully gotten rid of the petal, replacing it with color and structure from other parts of the image. Next we will work on removing some of the distracting detail from the lower left, to simplify the composition. I used the crop tool to crop a bit from the far left-hand side of the image. Then I selected the entire frame by using Select>All, and then used Edit>Tranform>Distort to stretch the picture a bit by pulling the lower left-hand corner down and to the left. I was careful not to stretch so much that the shape of the flowers became distorted, but I did stretch enough that I was able to reduce the amount of the branch visible on the left-hand side. |
|
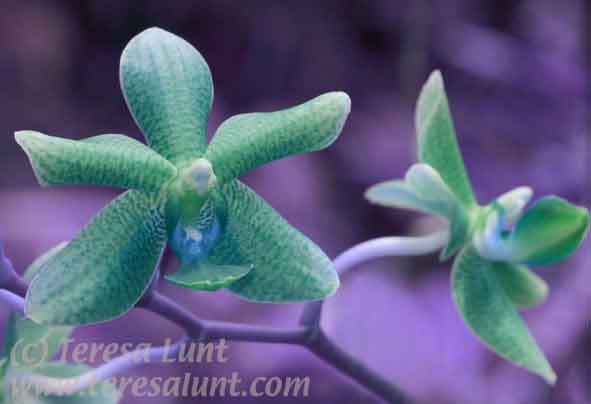
The next problem we will address is the bright background seeming to overpower the orchids in brightness and saturation. I wanted to start with a drastic change to the colors, so I inverted the image using Image>Adjust>Invert. Inverting the image produces a negative of the original image, both in color and in brightness. I didn't want to invert the brightness, just the color. So I then used Filter>Fade at 100% opacity and chose Color from the pulldown menu in the dialog box that comes up. Fading to color mode returns the original brightnesses that were inverted by doing Image>Adjust>Invert, but leaves the colors inverted. In other words, light areas stay light, and dark areas stay dark, but the colors are all inverted. You can see the resulting drastic change to the colors in Figure 3. |
|
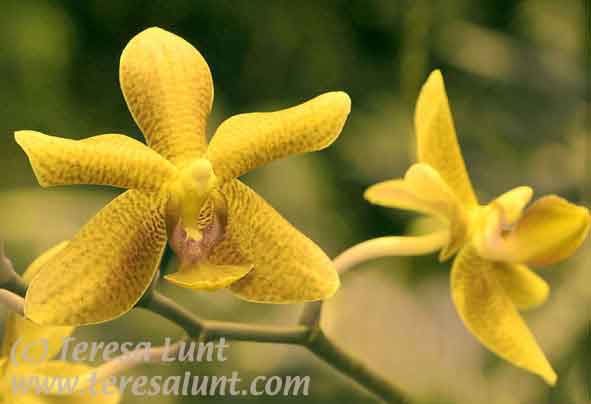
I didn't want to have green flowers on a purple background, however. So I used the channel mixer (Image>Adjust>Channel Mixer) to experiment with color changes that would give a pleasing result. What I was after were bright, light colors for the flowers, with a darker background. Also, I wanted the background to be recognizably green, since it represents foliage, but not a bright, distracting green. I simply experimented with the channel mixer until I got a combination I liked. The channel mixer is a powerful tool, but can be rather unpredictable. You can make some very unusual color changes, but you just have to keep trying until you find an effect you like. What I did was found an effect that was close to colors that satisfied my requirements. Then I did some final tweaking using Image>Adjust>Hue/Saturation, Image>Adjust>Color Balance, and Image>Adjust>Curves to fine-tune the colors, increase the saturation of the flowers, darken the background, and increase the color contrast. The result is that your full attention is on the flowers, which seem to glow against a muted background. You can see the results in Figure 4. |
|
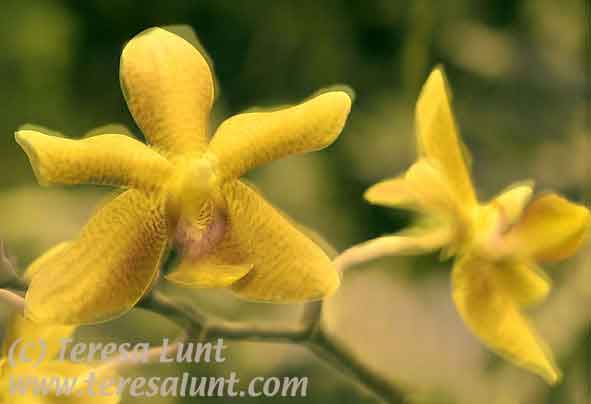
While I really like the image in Figure 4, I wanted to do a final set of manipulations to give the image a dreamlike feel. Again, we create a duplicate layer by using Layer>Duplicate Layer. Using the Move tool from the Photoshop toolbar, we'll move this layer a very slight bit to the upper right. Then we'll change the opacity of this layer to 50%. Now I want to apply a slight distortion to this layer. To do this, I use the wave filter (Filter>Distort>Wave). For a very slight effect using this filter, choose small amplitudes and medium-to-long wavelengths. You will have to experiment a bit. If you don't like what you did, just undo (Edit>Undo) and try again using different slider settings. Next I applied a slight blur, using Filter>Blur>Gaussian Blur with a radius of five pixels. Then I flattened the image. Figure 5 shows the final result. |
|
You can see that the final image is no longer a literal photographic rendering of the subject, but has a soft, dreamlike feel to it. The flowers are brightly colored and stand out against a muted shadowy background. The final distortions almost give a feel of motion to the picture, as if the wind were brushing against the orchids. |
![]()