digital art by teresa lunt
digital artdigital artdigital artdigital artdigital art

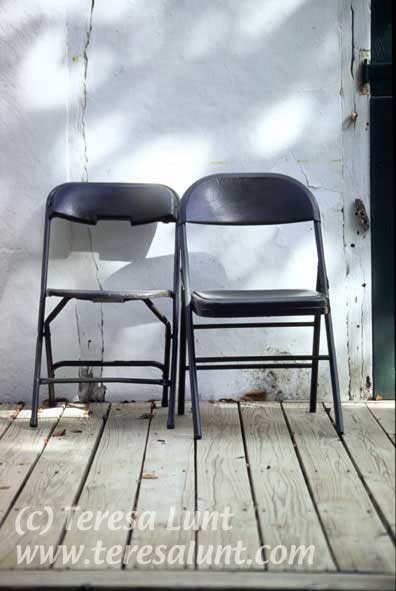
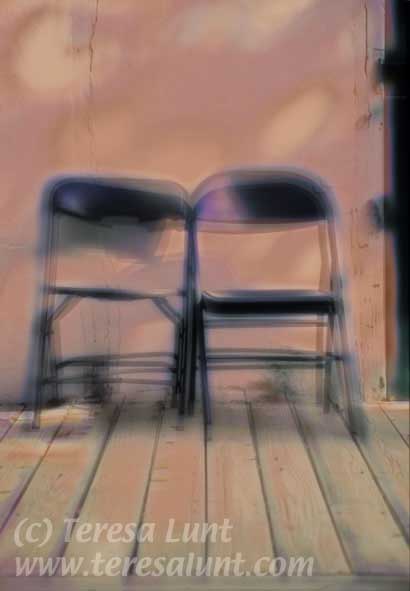
Tutorial 4: Two Chairs

In tutorial 3, I showed you how we could transform a digital photograph into something that felt like a hand-drawn and hand-painted illustration. In this column I will show you something quite different. We will retain some of the photo-realistic feel of the original photograph, while adding a degree of movement and mystery to the final image.

We will start with an image of two folding chairs that I photographed in a restored plantation called Pedro St. James on Grand Cayman Island in the Caribbean. See Figure 1.

photoshop tutorials
Figure 1

I shot this photograph with Fuji Sensia 100 film and scanned the resulting color slide with my Minolta desktop filmscanner. This produced a file of around 20MB after converting to 8 bit color (the scanner produces scans in 16 bit color, with the file twice as large, but most of the manipulations I do in Photoshop work only on 8 bit files, so I have to lose that extra precision).

I liked the feeling of this picture, of two absent people who had been sitting companionably together in these chairs. I placed the chairs close together to emphasize this feeling.

I also liked the interplay of light and shadow on the wall behind the chairs. It gives a sort of nostalgic feel of the lateness of the day. And I also liked the bits of leaves that are scattered about the wooden deck. This gives the feel that this scene has been here for a while, neglected, with a sense of time passing.

I wanted to manipulate the image to emphasize these qualities and to give it a magical feel.

First I made a duplicate layer in Photoshop, using Layer>Duplicate Layer. I applied a Gaussian blur to this layer, with a medium to large blur radius. The blur radius to use depends in part on the pixel dimensions of your image, so you can experiment with this setting. Then I applied Edit>Transform>Scale to the blurred layer, to stretch it out in all directions so that the blurred subject was slightly larger than the unblurred subject.

Then I set the opacity of the blurred layer to 65 percent. You can see the effect of this in Figure 2. There is a softening effect, and you can see a halo around the chairs and the wooden panels of the deck.

photoshop tutorials
Figure 2

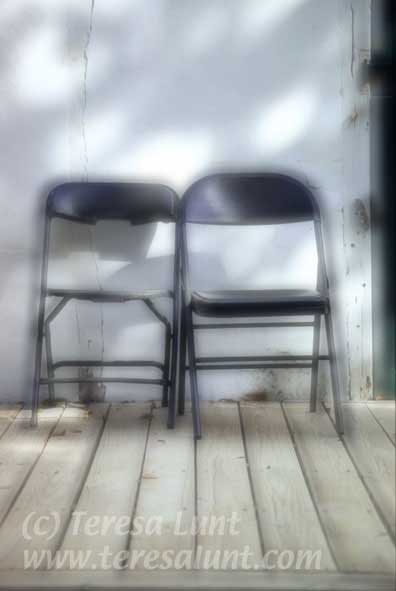
These manipulations, of creating a slightly enlarged blurred layer and blending it with the original image, are inspired by Freeman Patterson and Andre Gallant's book Photo Impressionism and the Subjective Image. In that book, the authors describe the technique of slide montages, in which you photograph the same subject two or more times on color slide film, with one or two of the exposures taken out of focus (blurred) and slightly zoomed in or out or slightly off center. Then the multiple slides are sandwitched to create the final image. Here we have done a very similar thing in Photoshop, using layers to blend the blurred and unblurred image, instead of different sandwitched slides.

Then I applied the filter Distort>Diffuse Glow to the blurred layer, with a purple color. Be sure to set the grain to zero in the Diffuse Glow filter, and set the Amount somewhere in the middle, around 5. If the effect is too strong, you can always undo and try again with a lesser amount, or just do Filter>Fade to fade out some of the effect. This basically made all the light areas of the image purple, which was not the final color I wanted. But I did want to retain a tinge of purple to add some interest and mystery to the shadows.

So then in Image>Adjust> Hue/Saturation I selected magenta and moved this purple color to a muted yellow color. The Hue/Saturation tool did not select all of the purple glow, leaving a slight purple tinge to the shadows, as desired. I like the effect of the shadows having a slight purplish tone and the highlights having a warm yellowish beige tone. It strengthens the feeling of lateness of the day.

But this step removed too much of the dappled lighting effect from the back wall. So using the history brush I selected an earlier state of the image, namely that in Figure 2, and set the brush to a very low opacity, around 30%, and set the blending mode to lighten. Then I painted over some of the highlights. It is a subtle effect but gives a lot more life to the image. You can see the results so far in Figure 3.

photoshop tutorials
Figure 3

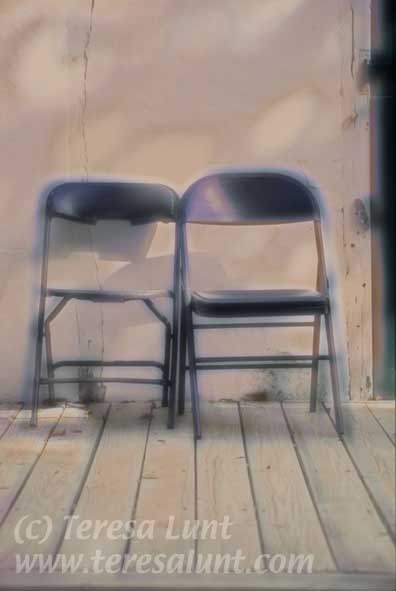
The history brush in Photoshop works as follows. Photoshop keeps a history of the past several states of the image (this is true only of the full version of Photoshop, not the free versions that come with some scanners and digital cameras). The history brush lets you select one of these history states, and then when you paint with the brush you are actually painting with pixels taken from the history state you selected. This is an easy way to selectively merge two states of an image. You use the brush to paint over just those areas where you want to make this merge. You can change the opacity of the brush to increase or decrease the effect. This is a fun brush to experiment with, especially after you have made some dramatic color changes to the image, as we have done here.

I wanted to increase the contrast and color of the image, so I tried using Image>Adjust>Curves on the top layer (the blurred layer). I pulled down the curve to darken this layer. Then I changed the blending mode of the layer to lighten. Sometimes it is difficult to predict the results you will get from these manipulations and with the layer blending modes. You just have to try different things until you start to learn what to expect from which tools.

Next I flattened the image. Using Edit>Transform>Skew, I straightened the lines of the image. You can see the results so far in Figure 4.

photoshop tutorials
Figure 4

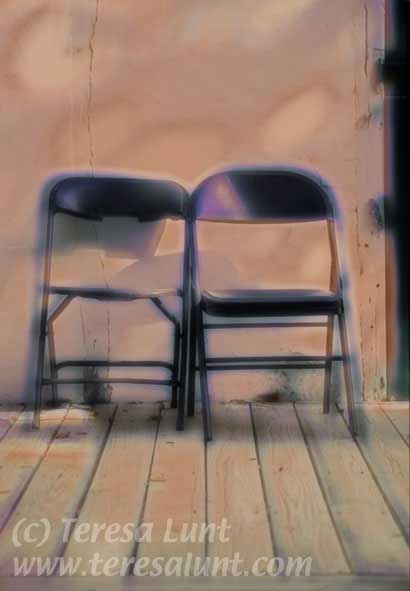
To give the image a final ghostlike quality, I used Filter>Distort>Pinch with a value of 25. The pinch filter pinches the center of the image, shrinking it relative to the rest of the image. The setting of 25 is a medium setting, because I didn't want a really strong distorting effect. Then I used Filter>Fade to blend the pinched image with the unpinched version of the image. I also used Image>Replace Color to darken the shadows on the far wall. The result, shown in Figure 5, gives the feeling that the chairs have been recently moved by the departure of their occupants. This happens because pinch effects primarily the center of the image, where the chairs are, and not the wall behind or the wooden deck in front. So only the chairs appear to be in motion, against a stationary background. You can almost feel the absent occupants of the chairs, as their motion in conversing with each other and then finally leaving the scene moves the position of the chairs slightly.

photoshop tutorials
Figure 5

If you compare the original image with the final result, you can see that we transformed a quite literal image to a mysterious one that suggests missing actors and a piece of a story.

digital art by teresa luntdigital artdigital artdigital art

Send an e-card!
photoshop tutorialphotoshop tutorialphotoshop tutorial