|
|
|
|
|
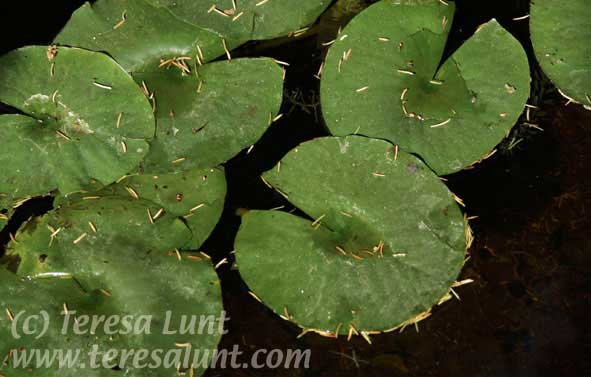
Tutorial 10: Lilypads This time we will start with a digital photograph of lilypads taken in the garden of a small inn in the California wine country. Figure 1 shows the original image after a little cropping. I happen to like images of lilypads. There are a few examples of similar images (after manipulations similar to the ones I will describe here) in the Hawaii gallery on this website. This particular image appealed to me because of its simplicity of composition and the almost straight-down angle of view I was able to obtain by standing almost directly over the lilypond and pointing the camera straight down. The simple composition and straightforward angle of view also lends itself to rendering in an illustrative style. So that is what we will aim for here. We will progress through a number of manipulations aimed at producing an image that looks like a hand-drawn and hand-colored illustration. Some people might even say that the final image has the very simple look of a woodblock print. |
|
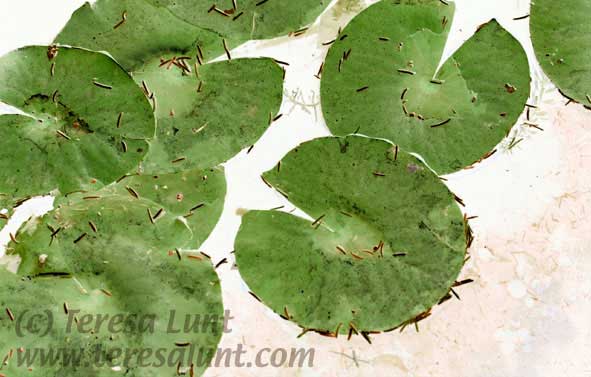
The first thing I want to do is to get rid of the black background. So we will begin as we did in Tutorial 9 by inverting the image using Image>Adjust>Invert to produce a negative of the original image. The negative of the image will have light tones where the original had dark tones, and will keep middle tones where the original image had middle tones. So inverting the image will produce a nearly white background, but the leaves will keep their middle tone. But inverting the image also inverts all the colors, turning the green leaves to purple. In order to preserve the original colors of the image, we must fade to luminosity mode using Filter>Fade at 100% opacity and choosing Luminosity from the pulldown menu in the dialog box that comes up. The overall result of inverting and then fading to luminosity mode is to make the dark areas light and the light areas dark, while preserving the original colors, so that, for example, green is still green. |
|
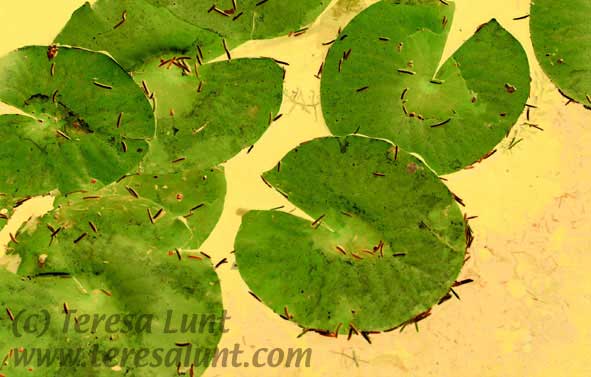
Now that we have lightened the background, I want to add some color to the background. We will do this using Image>Adjust>Channel Mixer. I added yellow to the background by reducing the amount of blue in the blue channel, and experimenting with other adjustments in the Channel Mixer dialog box. The channel mixer definitely requires some experimentation and patience. But for drastic color changes it is a much better tool to use than Levels and Curves, because it gives a higher quality result. So be patient and keep experimenting until you like what you see. I also used Image>Adjust>Hue/Saturation to increase the color saturation, and I used Image>Adjust>Replace Color to deepen the yellow by decreasing its lightness using the "lightness" slider in the Replace Color dialog box. You can see the results so far in Figure 3. |
|
Now that we have rid ourselves of the black background and added bright yellow to the background to set off the green leaves, we now want to address our third problem, that of too much literal detail in the image. To remove some of this detail, I used the Buzz simplifier filter to simplify the image. Buzz is a Photoshop plug-in that is also available under the name PhotoArtMaster as a stand-alone program. Buzz removes detail from the image while keeping the sharpness of lines. It has the effect of simplifying blocks of color to give the impression of a hand-colored image. Buzz allows you to retain a selective amount of small detail, so you don't end up with only big blocks of color. In this case, I wanted to remove most of the small debris on the surface of the water as well as the many small black imperfections in the leaves. But I wanted to retain the detail of the larger pine needles that litter the leaves and the water, because they add some color and interest to the image. This kind of simplification gives the image its hand-drawn and hand-colored look. After using Buzz I softened its effects by using Filter>Fade in Normal mode at 65% opacity. This has the effect of blending the Buzzed state with the unBuzzed state. Then to retain additional edge detail, I created a duplicate layer using Layer>Duplicate Layer, and applied Buzz to this layer using its Edges Mono filter, which creates a white image with just the outlines of the objects drawn in black. (Alternatively, for this layer you could use one of the built-in Photoshop filters, such as Filter>Sketch>Charcoal, to achieve a similar effect.) Then I used Image>Adjust>Curves and Image>Adjust>Threshold to heighten the contrast in this layer, thereby losing some of the lighter and less interesting parts of the outline, so that I was left with the outline of just the edges of the leaves. Finally, I changed the blending mode of this layer to Multiply. For any given pixel position, the Multiply blending mode keeps the darkest of the two pixels in the two layers. This has the effect of adding the black outlines in the upper layer to the simplified image in the lower layer. To soften this effect, I then reduced the opacity of the upper layer to 65%. Then I flattened the image. You can see the results of these steps in Figure 4. If you don't have the Buzz filter set, what you can do instead (and what I did in the lilypads images in my Hawaii gallery on this website) is to use the Rubber Stamp (also called Clone) tool to remove the unwanted detail. This, however, takes a great deal of time, since each unwanted black speck must be removed individually. Alternatively, you could try using one of the built-in Photoshop filters, such as Filter>Artistic>Dry Brush, and experiment with its settings. To retain some detail you can then try using Filter>Fade at an opacity of between 50% and 75%. Many of the built-in Photoshop filters have the effect of simplifying the image, and then using Filter>Fade allows you to retain some of the original detail. You can have a lot of fun experimenting with these filters. |
|
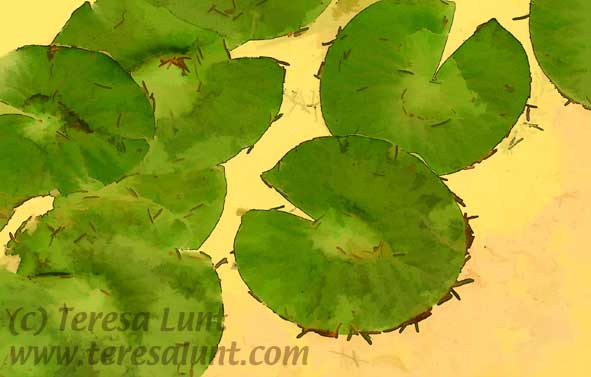
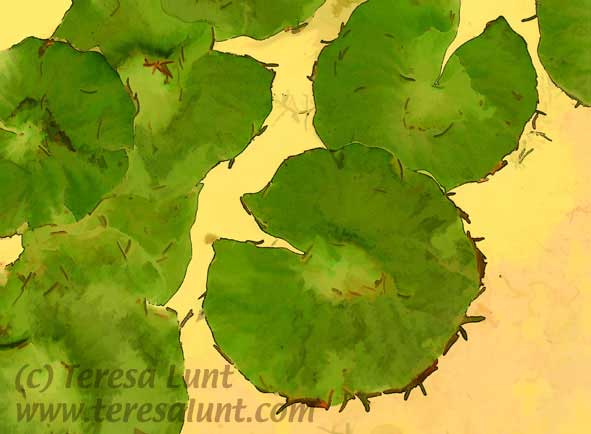
Now we've succeeded in removing the black background from the image, adding some interesting color, and removing detail. The final touches I want to make are to alter the composition somewhat to place more emphasis on the two large lilypads on the right-hand side of the image, and to add a bit more interest to the image through the use of a small amount of distortion. I selected the left side of Figure 4 and used Edit>Transform>Scale to compress it somewhat and Edit>Tranform>Skew to stretch it a bit. Then I applied Filter>Distort>Wave to add just a small touch of distortion to the image. The Wave filter allows you to precisely control the amount of distortion you achieve, through the use of several sliders and the selection of several parameters. Generally, the longer the wavelength and the smaller the amplitude, the smaller the amount of distortion that is applied. To achieve an effect that you like, you will have to experiment with these settings. You can see the final image in Figure 5. |
|
Just as we originally envisioned, the final image has the appearance of a hand-drawn and hand-colored illustration or woodblock print, rather than a realistic rendering of the scene. The viewer would never guess that the image started life as a photograph. |
![]()